Astronomical Images, Acquired from Within 10 Meters of a Shielded Streetlight
Jeffrey R. Charles © Copyright 2011 Jeffrey R. Charles, All Rights Reserved. |
|
Astronomical Images Acquired in Close Proximity to Shielded HPS Streetlight.
Contents: |
Introduction:
|
The pursuit of amateur astronomy is often hindered by artificial lighting, most of which is concentrated in major cities. Some lights are more detrimental than others for astronomy, depending on their spectrum, the degree to which they throw direct light up into the sky (where the light and energy used to produce it is wasted), and other factors. It is not unusual if the closest significant light to you is the one that influences observing most.
Getting away from artificial lighting is one of the main reasons amateur astronomers travel with their telescopes. However, such travel ceases to become an option if it conflicts with work hours, or if one's health degrades to a point that it is extremely difficult (or even impossible) to make the long drive away from city lights. Health conditions can even preclude moving a telescope down the street to get a few tens of meters to get farther from a light. Therefore, when a streetlight is right by the corner of one's yard, observing may have to be attempted at a mere 10 to 20 meters from the light. The good news is that this is possible to a degree, if the light is properly shielded. Artificial lighting has little adverse effect on observing the moon and planets (other than perhaps causing glare at the eyepiece), but the moon and planets are but a small fraction of the wealth of astronomical objects in the sky. Deep sky objects (nebulae) are numerous, but most are so dim that they are washed out by city lights. The problem is compounded when a bright streetlight is nearby, unless of course the streetlight is properly shielded. This web page covers a few well known basics about artificial lighting and amateur astronomy, as well as presenting some images of astronomical objects that were taken after an effective shield was installed on a local streetlight. This web page also covers the substantial degradation in shield performance that occurred when the south side of the shield (the side toward my house) was inadvertently shifted and damaged as crews were reducing the degree of shielding to a neighbor's house on the north side. The impact of shield damage is captured here to better describe the reduction in shield performance for a subsequent work order request to fix the shield, since on site crews tend not to have time to make contact and get specifics from requesters in real time. When I moved to this area, the streetlight at the northwest corner of my yard was initially problematic but was barely tolerable for the near term because some astronomical observing could be done in the back yard, even though there was another light visible from the back. There were also some areas close to the front of the house that were partially shaded from the streetlight by junction boxes on the telephone and cable lines. However, in mid August 2011, the local power poles were changed, and the streetlight was moved up to a height of 27 feet, 8 inches above the street, which is considerably higher than before. This additional height made the light visible over the house, even from the back yard, so it instantly became a bigger problem. The new light position also let it shine in my window at a brightness of about 7 lux, or bright enough to record video with a 20-year old camcorder. A few places I've lived offered street light shielding to reduce glare coming in windows at night; and, at least when a parallel concern, to accommodate amateur astronomy. Fortunately, the utility where I now live (LADWP) offers both shielded HPS lights and shield attachments, or the best of both worlds. (I didn't inquire about a yellow low pressure sodium (LPS) light because this is a significant change I wouldn't want to subject neighbors to without unanimous approval.) On this occasion, it was possible to document light levels before and after the shield was added, and the excellent results in my yard were quite dramatic. Before the fist version of the shield was damaged during modification of its north side, it was so effective that local cats would sleep in my front yard because it was dark enough that they felt safe doing so. (Prior to the light shield, local cats had been disappearing but coyote sightings were increasing, so cat preservation was an unexpected benefit.) The light level in my yard went from an ISO 100 EV level of 1.3 (2 seconds at f/2.2 gives proper exposure) before the light was changed and the shield added, to EV MINUS 4.6 (100 seconds at f/2.0). In other words, the new shielded light combined with a side shield made about a 60:1 difference in the ambient light levels in parts of my front yard. This exceeded my expectations. As this web page will demonstrate, a good shielded streetlight with an attached additional shield can make it possible to observe and image at least brighter deep-sky objects from within as few as ten meters of the light pole. It is even possible to achieve some degree of dark adaptation. (And, the shield keeps the streetlight from glaring into one's window.) A damaged shield still permits some astronomical observation and imaging, but requires precautions such as shielding the camera lens or telescope aperture from direct artificial light reaching it through gaps in the shield. A damaged shield is still better than no shield at all, however. |
 |
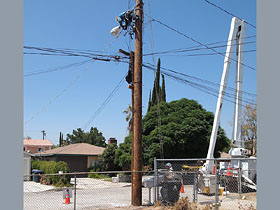 |
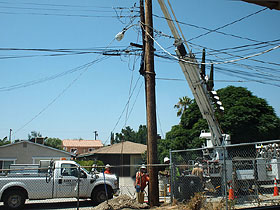
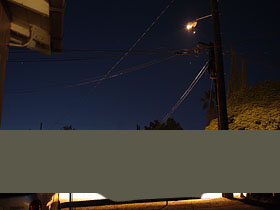
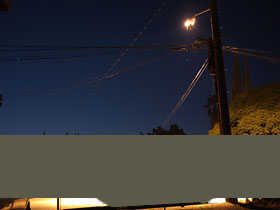
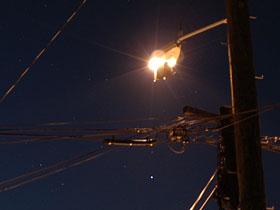
| Left: Streetlight at NW corner of my yard, before its height was increased. Junction boxes on the phone and TV lines provided partial shading in some locations, but in general the front yard was unsuitable for deep sky astronomical observing other than occasionally in directions directly away from the streetlight. Right: When the power pole was changed, the streetlight was raised to 27 feet, 8 inches above the street. This made it visible even from the back yard. Increased height also eliminated any useful shading by junction boxes on the phone and cable TV lines, as this picture (taken from near a location that was formerly shaded) clearly shows. I inquired to see if streetlight shielding was possible. Fortunately, it was. | |
Return to Local Table of Contents
Flat Bottom Versus Bulbous Streetlight Glass
|
In our area, the local High Pressure Sodium (HPS) streetlight was recently changed from the type with a bulbous lensed bottom glass to the type having a clear flat glass and a slightly recessed light source.
For astronomy, the new light is better than the old one because the flat bottom glass and slightly recessed light source position causes all of the direct light to go downward, and does not waste energy by casting unwanted light up into the sky. The light on the ground actually increased a little, though I'm told the new shielded light is of higher wattage. While this change in a light does not by itself permit deep-sky astronomical observation in proximity to the light pole (and thereby my front yard), it does locally reduce brightness of the sky and improve observation conditions from greater distances, including my back yard. |
Streetlight Shields
|
Adding a shield attachment to the shielded light further improves conditions for astronomy because it keeps direct artificial light from entering the telescope aperture or falling on the ground in proximity to the telescope. The former is good because it prevents excessive flare from stray light, and the latter is good because it permits some dark adaptation as long as one looks down or in a direction not illuminated by the streetlight. This in turn makes it possible to observe and image a modest number of brighter nebulae.
Damage to the shield in a way that permits significant light to get past the shield and enter the telescope aperture or fall on the ground in proximity to the telescope causes excessive flare and inhibits dark adaptation, though not to the extent that is the case when no shield is present at all. In the absence of any shield, the situation is all but hopeless, even if light pollution rejection filters are used. To show effectiveness of the light shield, pictures of deep sky objects in this web page were taken without the benefit of any light pollution rejection filter or narrow band filter. However, color striping on the sensor of a conventional digital camera, as well as the camera's white balance settings, were used to obtain slightly better results than would have been possible if acquring images without giving any thought to these aspects. |
First Iteration of Light Shield, Performance
 |
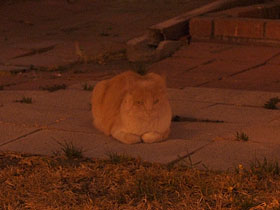 |
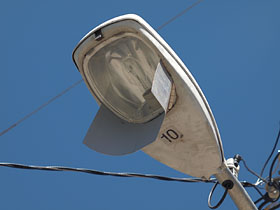
Left: Daytime picture of shielded streetlight. The shield was inadvertently installed in a way that also shielded my neighbor's yard to the north, which had to be addressed. Right: At night, a local cat enjoys the new found darkness of my front yard. To illustrate how dark it was, this is a 40 second exposure at f/2 with the camera set at ISO 250. An exposure time of only one second at the same aperture would have resulted in an equally bright image before the shielded light and shield were installed, so the shield is effective. The lack of well defined shadows also shows the shield is effective. It was nice for the brief time before the shield was damaged. |
 |
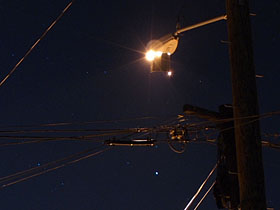 |
| Left: Night picture of the shielded streetlight, showing effectiveness of the shield in preventing flare in this 15 second exposure at f/3.2. From this vantage point in my yard, the shield completely covers the light source and the visible highlight is only indirect light. Foreground details are masked out in gray, but the good street illumination levels are shown low on either side. Right: Crop from left picture showing the constellation Lyra just below the shielded light. Yes, those really are stars visible beyond the streetlight! It was even possible to see the Ring Nebula (M57) in binoculars at this time, while only about 15 degrees from the light. Closer to the light itself, the small amount of glare visible shows that all the direct light is being reflected downward. Spikes extending above the light are diffraction from the camera lens iris. | |
Return to Local Table of Contents
Second (Mangled) Iteration of Shield, Performance
 |
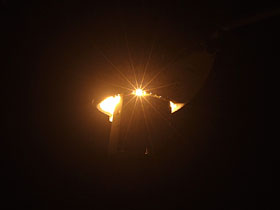 |
Left: Daytime picture of shielded streetlight from southwest, after south side of shield (at top) was damaged. Removal of the left part was intentional, to provide light for my neighbor to the north. Removing the north part of the shield alone would not have made a significant difference in observing quality, but damage to the south side, plus a gap where the shield was shifted at the point where it is flat rather than curved, combine to add a lot of light to my yard, to an extent that deep sky observation is hindered, though not completely impractical. It's still better than no shield at all. A more general concern is that the damage minimizes the number of mounting tabs that function to secure the shield, possibly making it unstable. Right: Close up of light taken from southeast at night, showing that lots of light gets around the damaged part of the shield at left and through the gap near center. Light reaching the camera from where the north part of the shield was intentionally removed at the right is insignificant by comparison, and is of similar brightness to what the left side had been before the shield was damaged. |
 |
 |
| Left: Night picture of shielded streetlight after the shield was damaged, taken from about the same vantage point and at the same exposure and white balance setting as previous pictures of the undamaged shield. The moon had just set so there is slightly more sky brightness at left. This vantage point is one of the most favorable positions for shielding by the damaged shield, but is too close to the house for much sky coverage. Right: Crop from left picture, showing the constellation Lyra just below the shielded light. Several stars are imaged here, but Vega was only star near the light obvious via naked eye from this vantage point due to glare. Comparing this picture to the crop from the picture taken before the shield was damaged shows an obvious increase in glare, though not as much increase as in most of the yard. Most of the light is still directed downward, but the damaged south part of the shield, being bent inward over the streetlight reflector, is also reflecting some light to the side. It was not possible to even detect the Ring Nebula (M57) in binoculars on this occasion, even half an hour after the moon set. It is likely that M57 could still be observed if at an elevation angle higher than the light. | |
 |
 |
| Left: Picture of Lyra when at a greater 30 degree angle from the damaged light shield, showing flare from the streetlight illuminating the camera lens. Exposure is 10 seconds at f/2.8 with a 90mm lens. Right: Picture of Lyra with camera lens shielded from streetlight. The need to shield the lens makes guided photography at close angles to the light impractical. | |
Return to Local Table of Contents
Astronomical Images Acquired from Within 10m of Shielded Streetlight
 |
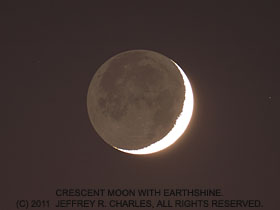 |
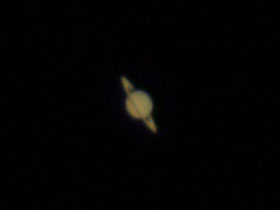
| Left: Saturn can be imaged even when a telescope is in proximity to an unshielded streetlight, but deep sky objects are a different story. This image of Saturn is a 0.5 second exposure through a 9 cm aperture telescope, with the digital camera ISO set to 100. Right: Crescent moon, including the shown darker part lit by earthshine, can also be imaged in proximity to an unshielded streetlight, but only if the lens aperture is adequately shielded from the streetlight. Unless noted otherwise, the following pictures were taken with an Olympus E-P2 camera after the local streetlight was shielded, but the optics were shaded from light leaks in the shield. | |
 |
 |
 |
|
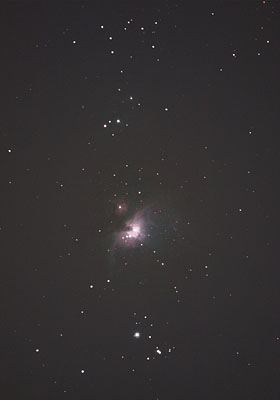
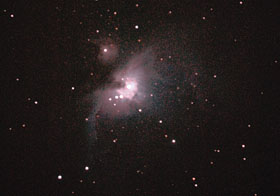
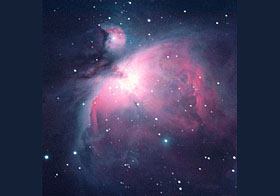
| Sword of Orion. Stack of four tracked but unguided 1 minute exposures through a 500mm f/5 lens, most taken at different white balance settings, ISO set to 250. The Orion Nebula (M42) is just below center. It was only possible to image about half this much nebula before the streetlight was changed to a shielded one with a shield attachment. | Top: Enhanced crop of M42 nebula from picture at left. It was difficult to observe as much of the nebula as what is imaged here before the streetlight was shielded. Bottom: M42, imaged on film from a dark site (Camp Verde, AZ) in 1980's. Dark skies permitted a full 1-hour exposure without overexposing the sky, thus capturing more of the nebula. |
 |
 |
 |
|
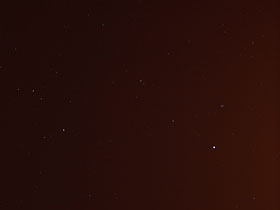
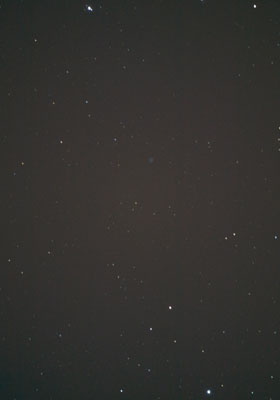
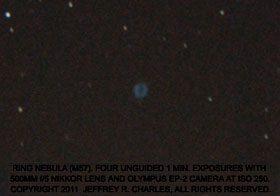
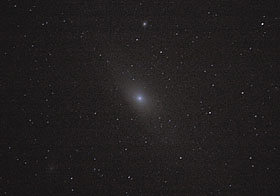
| Stars in Lyra. Stack of four unguided 1 minute exposures through a 500mm focal length f/5 mirror lens, most taken with different white balance settings at ISO 250. The Ring Nebula (M57) is a tiny dim round object just above center. M57 is one of the few nebulae that was observable before the light was shielded. | Top: Enhanced crop of M57 from left picture. Bottom: Galaxy (M31) in Andromeda. Stack of two unguided 1 minute exposures, taken with the setup used for M57. This enhanced image shows only the central part of the galaxy. Far less of the galaxy was visible even when near zenith before the streetlight was shielded. The galaxy image would fill almost the full width of the picture if photographed from a site more than about 100 km from the nearest major city on a moonless night. |
Hopefully, a Future with Fewer Stray Photons
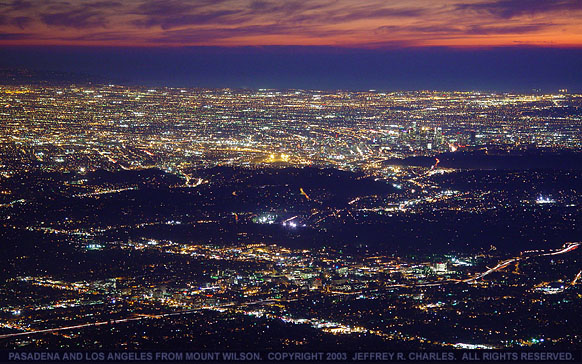 |
| From Mount Wilson, the Los Angeles area looks like a sea of lights. A picturesque sight to be sure, but the lights also brighten the night sky in the city and above the mountains near the city. If each light was shielded, the ground and objects on it would be illuminated, but the light sources themselves would be invisible when viewed from above. The extent of light pollution is revealed on occasions when it actually gets dark on Mount Wilson after a thick marine layer covers the city at night. This 2003 twilight exposure was 4 seconds at f/3.5 and a focal length of 31mm with a Sony DSC-F707 digital camera set at ISO 100. It was taken before my shift on a night I was instrumenting the Mount Wilson 100 inch telescope. |
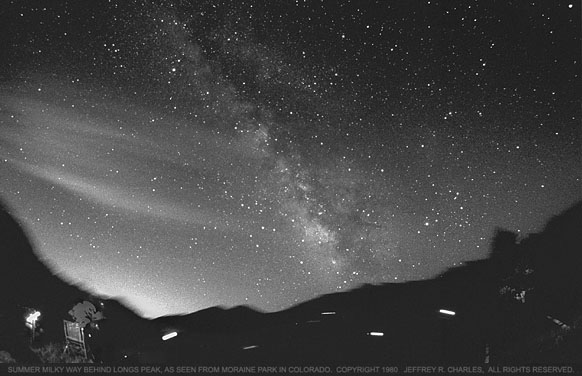 |
| The Milky Way is obvious in this 10 minute exposure at f/2.8 on Ektachrome 200 film, taken from a dark site (Rocky Mountain National Park, near Estes Park, Colorado) in 1980. The glow to the left is from Denver and other cities out on the plains but within about 150km. The cloud at left is illuminated by the distant city lights. |
|
Additional Reading: Jeffrey R. Charles' Total Solar Eclipse Images Eclipse Chaser's Journal - Jeffrey R. Charles' Eclipse Expeditions Steps to a Successful Eclipse Expedition, by Jeffrey R. Charles Need information about eclipses for your planetarium, motion picture, or other project? Jeffrey R. Charles performs science consulting in regard to eclipse phenomena and instrumentation. Please direct inquiries to Jeffrey R. Charles (jcharles at versacorp dot com). |
|
© Copyright 2011 Jeffrey R. Charles. All Rights Reserved.
Document Originated: 5 Sep, 2011 |